
Manage Payments and Refunds for all Program registrations and incoming Alternate revenue.
Payments and Refund can typically be found under the Payment Details tab of an individual Participant Registration (individual enrollment), Organization Program (company enrollment with in-house pricing) or an Alternate Revenue source.
If you have multiple payments to post, try posting Group Payments.
Post a Payment
To enter a new payment on a registration:
- Edit the desired registration and select the Payment Details
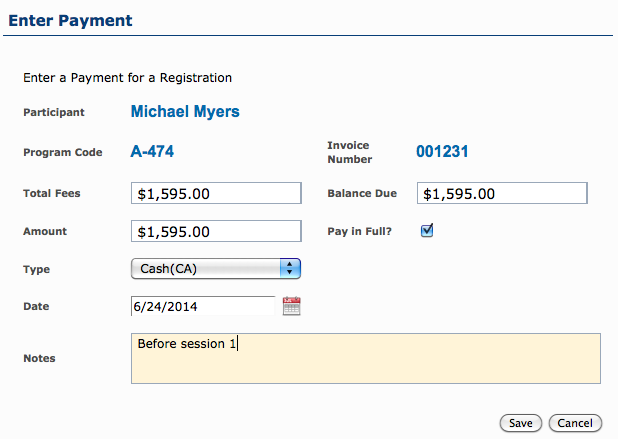
- Click Enter Payment, and the payment dialog will appear.
- Enter the Payment amount and Type (Cash, Credit Card, Bank Transfer, etc.)
- Save the Payment. You will see the payment appear below the invoice number, and the Collected/Balance Due will update.
- Save the Registration.
Posting a Payment of type Credit (CR)
Posting a Credit (CR) type payment means that you wish to remove the balance from the registration. This is done for 2 main reasons:
- You wish to remove the balance of a Registration that’s been Cancelled, Dropped or Transferred to another Program.
- You are unable to collect the payment, for one reason or another.
This Credit payment will act as a typical payment would (taking from the balance due, adding to the collected amount) but will appear under the Cancels column in reports.
Posting a Refund
To enter a refund on a registration:
- Edit the desired registration and select the Payment Details
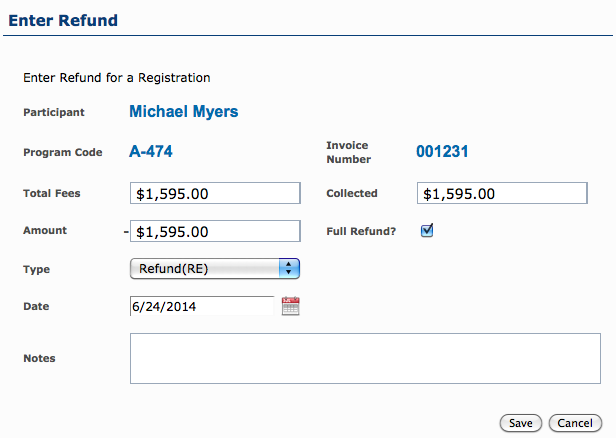
- Click Refund, and the refund dialog will appear.
- Enter the Refund amount and Type (Refund, Request Refund, Contract Sales Refund)
- Save the Refund. You will see the refund appear above any payments made, and the Collected/Balance Due will update.
- Save the Registration.
Financial Integrations: Invoice Source
If a registration is integrated with your financial or invoicing application (e.g. Freshbooks), you will be unable to post payments manually to the registration.
In order to update the payment details of the registration, change the Invoice Source to Custom. This will remove the invoice/payment integration, and will allow you to post payments manually.